How to create Icons in Photoshop and replace your standard Desktop Icons.
Desktop Icons made easy.
Note
: In this tutorial I'll show you how to create icons from a standard image and replace your desktop icons.
Step.1Open an Image into Adobe Photoshop
.
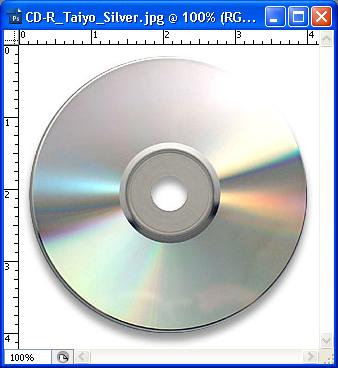
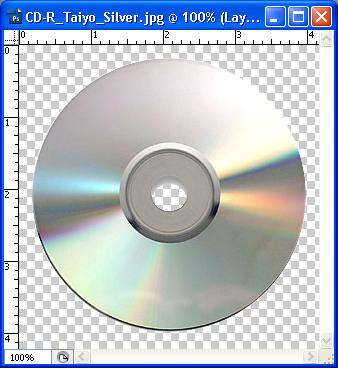
Step.2Erase the Background around the image.
Step.3
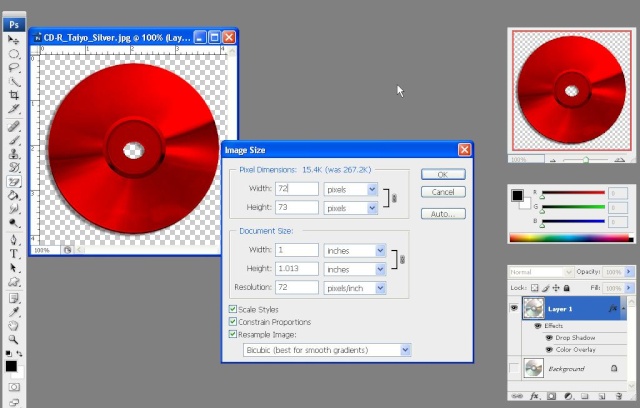
Apply Layer styles to the image, use your own setting untill you satisfy with
the final output ( for example apply thick shadows and highlights).

Step.4
Now it's time to change the size of the image. Right click on the document windows and change the image size to 72x72 px.
- Quote :
- information: Standard Icon sizes may vary between 32x32, 72x72, 98x98 and 120x120.
Step.5The converted image will look like this, save the image to a transparent PNG file ie .png optimized for web.
 Step.6
This step is available for registered users only, this step is very
important to create an Icon file and find more useful tool you can use
in "Photoshop Tutorial Forum" click here to
RegisterStep.7Finally
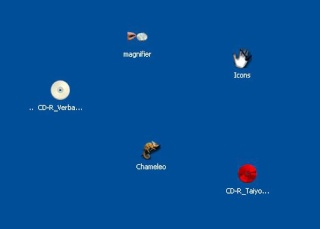
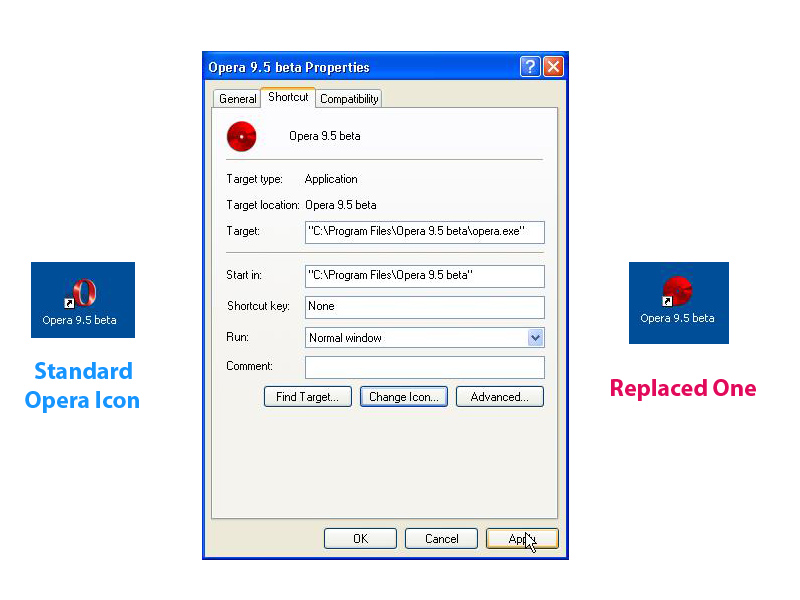
you have created an Icon. Now replace your desktop-icons with the ones
you just created in Photoshop like as shown in the figure below.
I hope that you have enjoyed this tutorial and have a nice photoshoping.
From
this tutorial you will be able to build your own icons (it's image
converted-Icons or Vector Icons) you can use them in your Auto-run CD's
or you can sell them for money.

Tutorial by,
Teaser:afro:


